Template:Plotting Competing Failure Modes: Difference between revisions
Jump to navigation
Jump to search
| Line 1: | Line 1: | ||
==Plotting Competing Failure Modes== | ==Plotting Competing Failure Modes== | ||
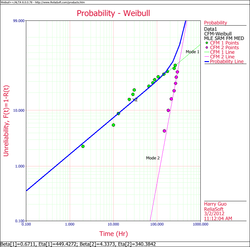
[[Image:Competing Failiure Mode Example 1 Plot.png|thumb|center| | [[Image:Competing Failiure Mode Example 1 Plot.png|thumb|center|250px| ]] | ||
<math></math> | <math></math> | ||
When plotting competing failure modes in Weibull++, your plots can contain the combined mode line as well as the individual mode lines. The User's Guide describes how these options can be turned on or off. | When plotting competing failure modes in Weibull++, your plots can contain the combined mode line as well as the individual mode lines. The User's Guide describes how these options can be turned on or off. | ||
